Showing posts with label Pinkfresh. Show all posts

Monday, March 8, 2021

WOW! Embossing with Pinkfresh Studio Geo Leaf Die

My Favorite Color!!

                                                          Here are all the products I used!


I wanted to play along with the newest WOW! March challenge and thought of making something with a cover die instead of an embossing folder as Handmade by Tasha did on her Youtube video. For this lovely card, I used my Pinkfresh Studio Geo Leaf Background Cover Die paired with an older set called Pinkfresh Studio Bloom. 

Directions: Die cut the cover from Neenah cardstock using the above die and then inked over the whole front with a clear embossing pad. I then sprinkled the WOW Iris embossing powder over the top holding the die cut piece with cotton pliers. I heat embossed after placing it on a cork trivet until the entire cover melted. I did add more embossing and heated again so as to hide where the pliers had held it to cover that spot and get a glossier coverage. It was magical watching the heat process progress across the beautiful front! I took my Bloom stamp which has 2 floral images and the Thank you sentiment and stamped them on a light pink-lavender cardstock using my MISTI tool. After using the same steps, they were also embossed. I then fussy cut them. At this point, I happen to notice I had a dark smoky purple seam binding and since it looked more in contrast with the front color and it gave even better texture contrast to the embossing, I ended up using it instead of the 2nd floral image as planned. A happy coincidence! I popped up both pieces and glued the cover down on another Neenah handmade card front to finish. I put my lovely Lady Head vase next to the card to take the pic, seeing that they matched beautifully! My favorite color is lavender if you haven't noticed.

Challenges:  WOW! March Colour & Texture (found under FB's WOW! Embossing Fans' page


Word Art Wednesday #481-482-Anything Goes


Sunday, October 6, 2019

Pinkfresh Studio Toy Shop Holiday card


Using the Pinkfresh Studio Merry & Bright Toy Shop stamp and die set, I made this card for the World Cardmaking Day 2019. I used my copic coloring for the images and made it twice. I used Stampendous White embossing powder for the outside greeting.  I also ink blended to make the "shop" look vintage. Adding small crystal bling and colored with the copics to match the lights.

Challenges:
Pinkfresh Studio Challenge #1-Favorite technique (copic coloring)
and Challenge #2 Holiday Card

Simon Says Monday Challenge: Let's Get Ready for Christmas

Mix It Up MIUCB #30 - Anything Goes + Open Technique


Thursday, February 14, 2019

Pinkfresh Magical Valentine and birthday card


Pinkfresh's Magical Christmas is not just for Christmas! I love the adorable Unicorn so much that I use it on all occasions. Here are two cards made for Valentines and an upcoming birthday!! The other dies I used are listed below. I heat embossed with silver on both of the Unicorns' horns! Love that shimmer! Also, used plain glitter paper as the backgrounds and sequins and stamping to add interest. The scarves were stamped with Neon Pink ink and copic markers to color.

Supplies:
Pinkfresh Magical Christmas stamp and die
Pinkfresh Fancy Floral (background flowers) die
Cityscape die which is on sale right now!
Neon Pink ink with copics for coloring!
Hero Arts Silver Embossing powder
Glitter paper from my stash!
Challenges:
Word Art Wednesday Challenge #374-375 Anything Goes

The House that Stamps built: Middle row across 
#Thedailymarker30day Challenge is going on
on        Instagram
and
             Facebook
Hope you will join in on the coloring challenge too!!

Monday, January 21, 2019

Pinkfresh Floral cover Die Cards


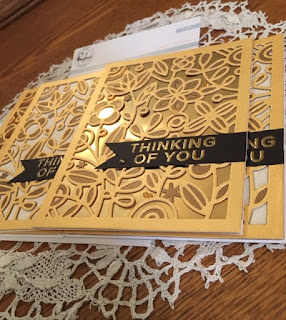
Using different specialty papers I used the Pinkfresh Fancy Floral 1 and 3 Cover dies. Using the Sentiment from the Pinkfresh Bloom set, I heat embossed onto black cardstock, and added it to the cards.
Using the Pinkfresh Geo Floral die with American Crafts ZING Copper Embossing powder as seen with WOW's product HERE I cut out the die from white cardstock, covered it with VersaMark ink and embossing powder. Then heat embossed. Next, I stamped with the Pinkfresh Bloom larger flower image onto light pink cardstock and followed the same steps and die cut it with matching die. I loved following the design from the previous blog post inspiration and used a seam binding bow to finish mine off. 

Challenges:
Word Art Wednesday Weeks #370-#371 - Anything Goes 
Pinkfresh January Challenge: Using October 2018 of DieCutting

Saturday, October 6, 2018

Pinkfresh Fancy Florals Rainbow Card

                                                                     Finished Card
                                                Top die cut layer being colored with Copic Markers
                                         Gluing the two die cut layers together after coloring.
                                              Two layers after being glued to each other.
                                         Mounted onto black background and sequins added
I received the new Pinkfresh Studios releases of their Fancy Florals 1 and 2 dies. Using


Copic Sketch Markers: R27, R22, RV02, RV04, V12, V15, YG11, YG17, Y32, YR15, BG02, BG11, BG15.
Paper: Neenah White and Black Cardstock to mount the two layers onto.
Sequins added with Micro fine glue tip bottle.
Ranger Platenum Empossing Powder for inside sentiment.

Instructions: Die cut two pieces from the two different dies from Pinkfresh Studios.  Color the top layer with the darker of the the two shades of each color. Color the bottom layer with the lighter colored marker. Glue them together with a Micro Tip Glue applicator, then mount onto a black card made into an A2 size. Emboss sentiment inside and add sequins to the front.
Here is my inspiration: Kelly Griglione

This makes a stunning card and is very relaxing to color!
Challenges:
Scrapbook.com World Cardmaking Day Challenge: I won top cards for 2018
Simon Says Stamp World Cardmaking Day


Tuesday, August 21, 2018

Pinkfresh A Day in the City Card


This is #JenniferMcGuireinspired for sure! After watching her video, I made this exactly the same way!! Love this stamp set.... together or separately!
To Make this card:
Using Pinkfresh A Day in the City I die cut it first then used the Geo Leaf Background die to leave it with pattern. I then added the separated images that were stamped and colored using my MISTI and Copic Sketch markers. The colors were Y11, Y19, YG06, R20,R22, for the houses, and then more YG06 with YG11 and YG13 for the trees. Same yellows for the sun and then made lines to fill in the "rays". Fussy cut them all out, and glued down with my Scotch fine line glue dispenser. I made it exactly like hers and it was really harder than I thought it would take. Now I have several cut out and in process to make a whole stack. I want these for the ones that have just left for college and those setting out on a new life.
I finally adhered it to a blue cardstock A2 card base. The next ones are different colors but the same really. Bolder colors!! Enjoy!
Challenges
Simon Says Stamp Monday Challenge: Back to School#11
Simon Says Stamp Wednesday Challenge: Back to School#89
WordArtWednesday Challenge Anything Goes #348-349#101
Cardz TV Challenge #61 Anything Goes#27

Friday, April 27, 2018

Pinkfresh Studio Card Re-do


Here's a card that started out "cute" using hte Pinkfresh Studio Say it with Florals and die set. Then I did what I hate to do, and got ink all over the bottom of the front as well as a few dots around the flowers. The more I tried not to, the more I got ink on other edges. So instead of throwing away the whole thing, I started trying to use an eraser and a white gel pen to hide the small marks. Do you ever thing that you are the only one that does this? Absolutely not true! We ALL do this. First, I tried alcohol remover, eraser and a white gel pen each, to remover some of the black ink but still didn't like the coverage. Well, as luck had it, I received "happy mail" from my recent order from Altenew company with a Altenew Creative Edges: Lace Die. I pulled it out and used a scrap of paper that just seemed to match...... and viola'! I layered it till I had covered all the marks and then used Tonic Studios Nuvo Jewel drops in Transparent Strawberry Coulis drops adding them freely around the images.
Other Supplies: Mommy Lhey inks in Paradise, and Bliss for the flowers and leaves. Pink Parchment paper by Recollections; Memento Ink in Tuxedo Black. Neenah White 80 lb. cardstock.
Well, I hope that you enjoy my "do over" card that came out even more feminine and cute than I had intended it to be.
Simon Says Stamp Wednesday Challenge: Anything Goes #248
Simon Says Stamp Monday Challenge: Flower Power: #196


Tuesday, November 14, 2017

Pinkfresh Studio Pink Florals Card


I loved using the new Pinkfresh Studio Say it with Florals stamp and their coordinating die!! After seeing the gorgeous set, I grabbed it up!! I chose to match the pink parchment paper with different inks from Simon Says Stamp Hybrid cube inks and Mommy Lehey in the Jelly Bean set. So pretty in PINK!! It was paramount to use my MISTI tool to have each stamp lined up with the die cut patterns on the paper.  There are 3 sizes of flowers and three layers per flower. One other layer is used for the "white" flower.  For the leaves, I only used the Mommy Lehey Leafy green ink and didn't do any extra layering which is also included in the stamp set.
  I loved the way it came out and have made more since! Love adding the little pearls in the centers to add some dimension! My friend loved it and I loved how pretty it came out!! Will be trying different inks to see how they look with it too. Great stationary gift idea, as well as, having extra "thank you's" for the holiday hosts and gift givers!
Other supplies include:
Memento Tuxedo black ink
Neenah Bright White in 110 lb paper
Fiskars 12 inch trimmer
Bone folder
Challenges:
Simon Says Stamp Wednesday Challenge: Snow White #265